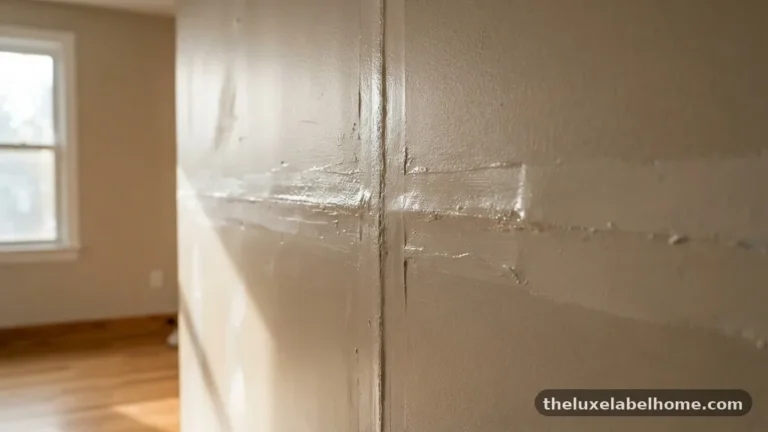
The Rub Test: How to Tell If Existing Wall Paint Is Oil or Water-Based
Determining whether your walls are coated in oil-based paint or water-based latex is a critical step before starting any renovation. Applying the wrong product can lead to catastrophic adhesion failures, where new layers peel off in sheets shortly after drying. Performing the Rub Test allows you to identify the binder chemistry of your existing surface quickly using common household supplies.
By applying a small amount of denatured alcohol to a cotton ball and rubbing it against the wall, you can observe whether the pigment transfers or stays put. This simple diagnostic prevents wasted time, costly materials, and the frustration of having to strip a failed paint job back to the drywall.
Performing the Rub Test Effectively
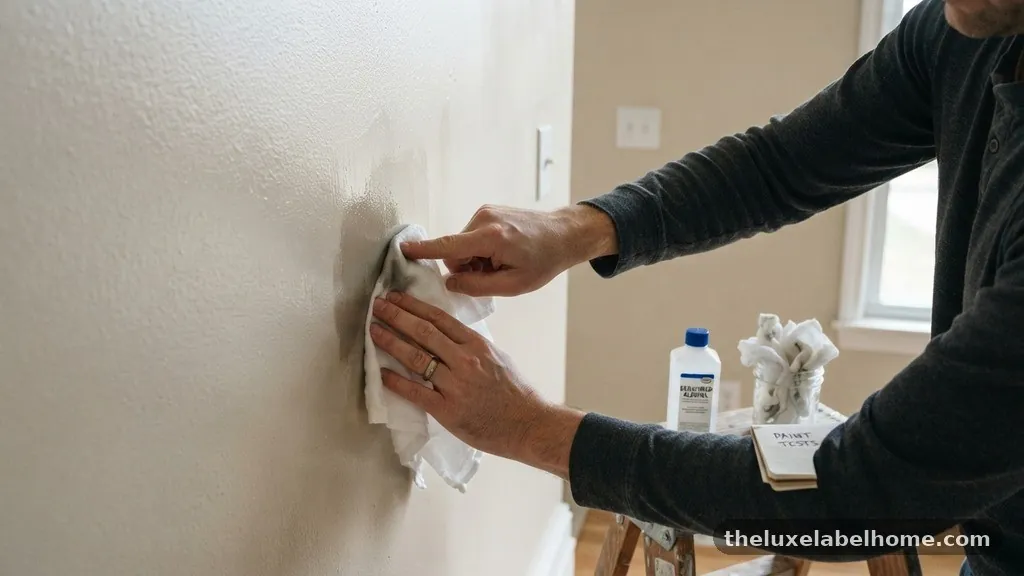
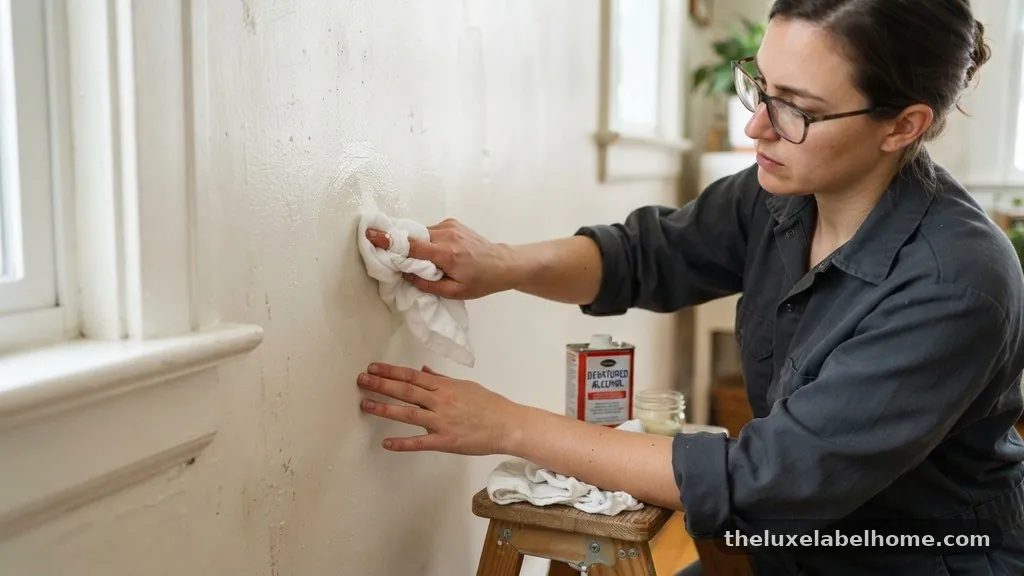
To execute the Rub Test, you only need three items: a clean white rag or cotton ball, a bottle of denatured alcohol, and a small, inconspicuous area of the wall to evaluate. Choose a spot behind a door, inside a closet, or low on the baseboard where any potential marring of the finish won’t be visible. Dampen the cloth or cotton ball thoroughly with the alcohol, but ensure it is not dripping wet.
Press the saturated material firmly against the painted surface and rub back and forth with moderate pressure for about fifteen to thirty seconds. This friction acts as a solvent-based probe that reacts differently depending on the chemical makeup of the binder holding the pigment to the wall.
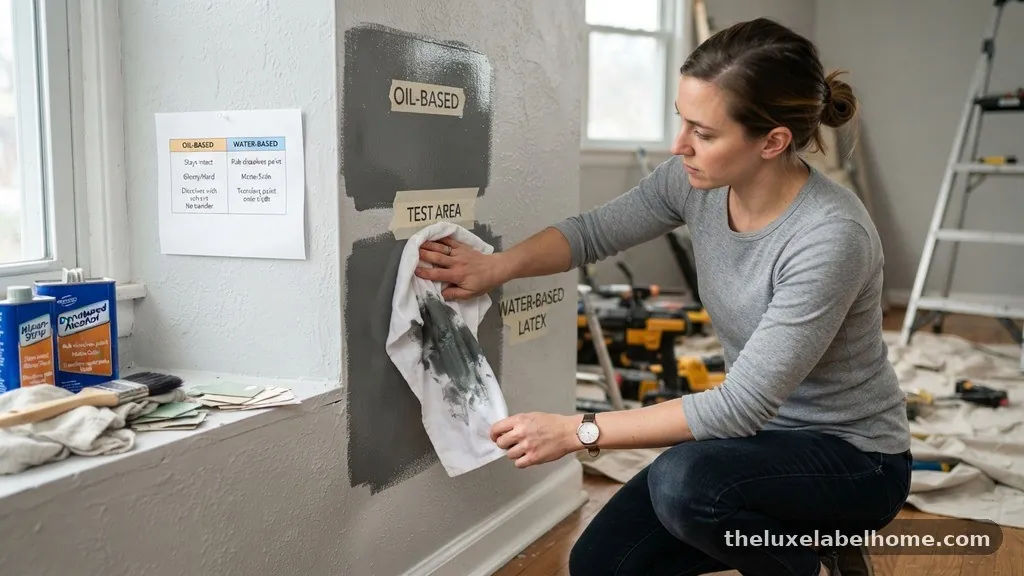
If the paint is water-based, also known as latex or acrylic, it will often soften slightly or transfer a significant amount of pigment onto your cloth. The alcohol works to break down the water-soluble resins that characterize modern latex paints. You will see a clear residue on the cotton ball, indicating that the surface is likely water-based and ready for a new coat of high-quality latex paint without specialized prep.
If you see no paint transfer at all, even after repeated rubbing, the surface is almost certainly oil-based. Oil-based finishes are cross-linked and hardened, making them highly resistant to the mild solvent action of denatured alcohol.
Why Distinguishing Paint Types Matters
The chemistry behind these two types of paint is fundamentally different, which directly impacts how they interact with each other. Water-based paints rely on water as a carrier, while oil-based paints use alkyd resins or natural oils that require mineral spirits or paint thinner for cleanup. When you attempt to apply a water-based topcoat directly over an old oil-based finish, the new paint lacks the chemical “bite” necessary to grip the slick, non-porous surface.
This results in a weak bond that will inevitably peel, crack, or flake away as the house settles or the temperature shifts. Understanding your wall type before you buy gallons of expensive finish is the most effective way to avoid a DIY disaster.
Conversely, applying an oil-based paint over a water-based surface is rarely recommended, though it is technically possible with the right preparation. Oil-based paints are generally more rigid and brittle than their latex counterparts. Placing them over a softer, more flexible latex foundation can lead to cracking as the underlying layer expands and contracts at a different rate.
By using the Rub Test, you confirm the current state of your walls and can make an informed decision about whether you need to invest in a specific bonding primer. This professional approach ensures your labor results in a durable, long-lasting finish that won’t require a redo in six months.
Comparing Common Wall Paint Characteristics
| Feature | Water-Based (Latex) | Oil-Based (Alkyd) |
|---|---|---|
| Solvent | Water | Mineral Spirits |
| Drying Time | Rapid (1-2 hours) | Slow (8-24 hours) |
| Hardness | Flexible | Very Durable/Hard |
| Yellowing | Resistant | Prone to Yellowing |
| Odour | Low | Strong/Solvent-heavy |
Beyond the chemical test, you can often infer the paint type by observing the surface characteristics. Latex paint typically feels slightly softer to the touch and may exhibit a subtle “rubbery” texture if you press your fingernail into it. Oil-based finishes feel harder, colder, and more brittle, often exhibiting a smoother, glass-like sheen even in flat or eggshell finishes.
These surfaces were popular in older homes, particularly on trim and doors, because they offered superior washability and scuff resistance before modern high-quality latex technologies existed. If your home was built before the mid-1970s, there is a very high probability that the original trim and doors were finished with oil-based products.
The Role of Bonding Primers
If your test confirms the existing paint is oil-based, you have two primary paths forward. You can either sand the entire surface to create a mechanical tooth for the new paint, or you can apply a high-quality bonding primer. A specialized oil-based or shellac-based primer acts as a bridge between the old, slick oil finish and the new, water-based topcoat.
These primers are formulated to adhere to glossy, non-porous surfaces that would otherwise repel standard latex paint. Once the primer has cured according to the manufacturer’s instructions, you can safely apply your chosen latex finish on top.
Using a bonding primer is generally faster and less labor-intensive than aggressive sanding. It ensures that the transition between layers is chemically sound and prevents the “peel-off” effect that occurs when paint is applied to an incompatible substrate. Always check the label on your primer to ensure it is specifically designed for “hard-to-stick” surfaces or explicitly states it can be applied over oil-based paint.
If you choose to sand instead, you must ensure you are removing the gloss, not just scuffing the surface. Any remaining shiny spots can act as a point of failure for the new paint, so thoroughness is mandatory when choosing the mechanical route.
Evaluating Trim and Doors Separately
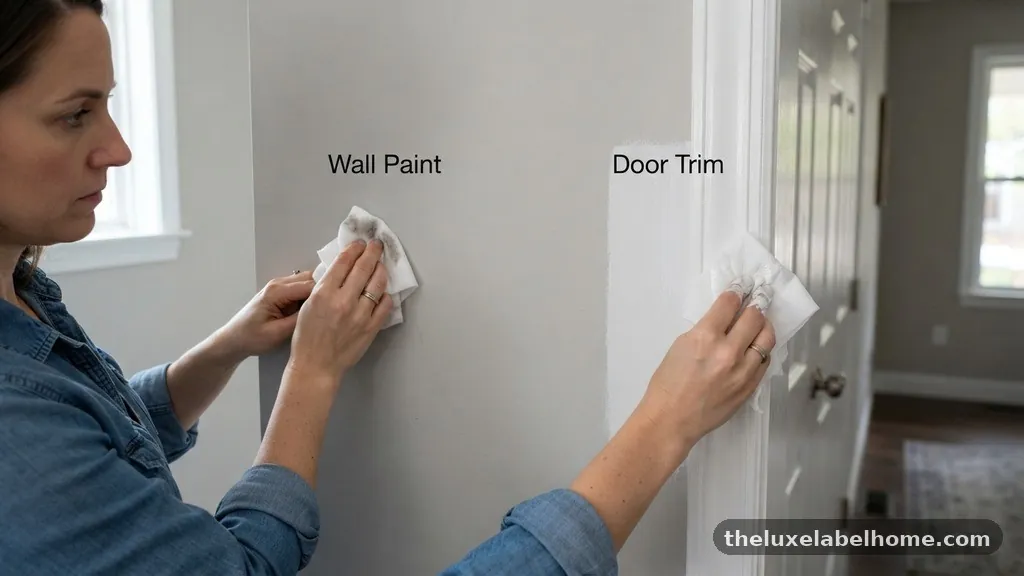
It is common for walls to be painted with latex while the trim, baseboards, and doors are finished with oil-based paint. This was a standard practice in residential construction for decades because oil-based paint provides a harder, more scuff-resistant finish that survives the wear and tear of high-traffic areas.
When you are planning a painting project, do not assume that the entire room shares the same chemistry. You should perform the Rub Test on every distinct surface type you intend to paint, including the walls, the window frames, and the door casings.
Testing these areas individually prevents the mistake of treating the entire room as a single entity. If you find that the trim is oil-based, you might decide to use a different primer for those specific areas while using a standard drywall primer for the walls. This targeted approach saves money on premium bonding primers, as you only use them where they are actually required.
It also ensures that your trim maintains its durability, as the oil-based base layer provides a solid foundation for the new, modern finish. Taking the extra five minutes to test the trim can save you hours of corrective work later.
Tools and Supplies for Testing
To get the most accurate results from your assessment, keep your toolkit simple but effective. You do not need expensive chemicals; a standard bottle of denatured alcohol from the local hardware store is the industry standard for this task. Avoid using rubbing alcohol or isopropyl alcohol if possible, as they are often diluted with water and may not be strong enough to react with certain types of older oil-based paints.
A plain white cotton ball or a clean piece of white rag is essential because it allows you to see the color transfer clearly. If you use a colored rag, you might mistake the fabric dye for paint pigment, leading to a false positive.
Keep a small spray bottle of clean water nearby to wipe down the area after the test. This removes any residual alcohol that might interfere with the drying of your new primer or paint. If you are testing multiple rooms, keep a log of which areas are oil-based and which are water-based.
This simple record-keeping will streamline your shopping list when you head to the paint store. You will know exactly how much bonding primer to purchase, avoiding the need for last-minute trips back to the store when you discover a hidden oil-based wall in the middle of a project.
Safety Precautions During Assessment
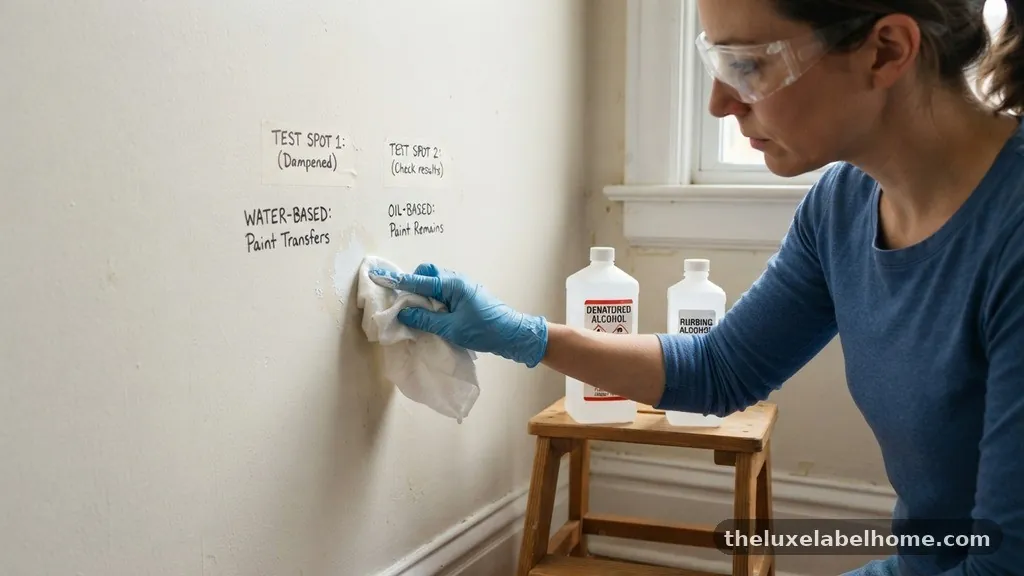
While denatured alcohol is a common tool for painters, it is a chemical solvent and should be handled with appropriate care. Work in a well-ventilated area, especially if you are testing multiple walls or a large trim project. Open a nearby window or run a fan to ensure that the fumes do not build up in the room.
Even though the amount of alcohol used for a single Rub Test is small, the cumulative effect in a small, unventilated closet can be uncomfortable. Wear gloves if you have sensitive skin, as the alcohol will strip the natural oils from your fingers and can cause irritation or dryness.
Keep your cleaning supplies and solvent bottles stored away from heat sources and out of reach of children or pets. Denatured alcohol is highly flammable, so never perform your tests near an open flame, a pilot light, or while smoking. If you spill any alcohol on the floor, wipe it up immediately to prevent slips or potential damage to finished hardwood or carpet.
These safety practices are standard in professional painting, and adopting them as a DIYer ensures your project remains a safe and productive experience. Always follow the storage instructions on the bottle to maintain the shelf life and safety of your supplies.
Troubleshooting False Positives
Sometimes, a surface might seem like it has paint transfer when it is actually just dirt or oxidation. Old paint, especially in kitchens or bathrooms, can accumulate a layer of grease or dust that transfers to your cotton ball during the test. If you see a brownish or greyish residue, try washing the area with a mild detergent and water first.
Once the surface is clean and dry, perform the test again to see if the residue persists. If the transfer disappears after cleaning, the surface is likely water-based and was simply dirty.
If the residue is the same color as the wall paint, it is definitely a sign of water-based latex. If you are still unsure, try scraping a tiny, inconspicuous area with a utility knife. Latex paint tends to curl or peel like a rubber band, whereas oil-based paint is more likely to chip into hard, brittle shards.
This secondary observation can act as a confirmation if the alcohol test feels ambiguous. When in doubt, it is always safer to treat the surface as oil-based and apply a bonding primer. A high-quality bonding primer will adhere to both surfaces, effectively neutralizing any risk of failure.
Common Mistakes to Avoid
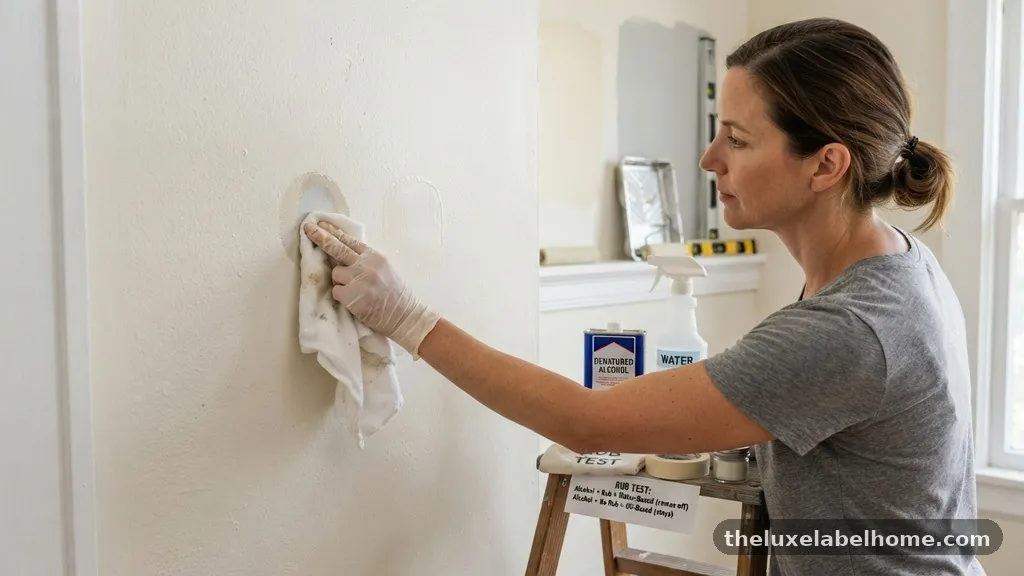
One of the biggest mistakes DIYers make is failing to test the surface in multiple spots. Paint can be applied in layers over the years, and a previous owner might have used a variety of products. A wall might have an oil-based layer underneath a more recent coat of latex, or different rooms might have been painted with different types of paint.
Perform the test on at least two or three different walls in the room to ensure consistency. If you find conflicting results, assume the entire surface is oil-based and prepare accordingly.
Another common error is applying the new paint before the test area has fully dried. If you dampen the wall with alcohol and then immediately apply primer, you might trap moisture or solvent residue under the new layer. Give the test area at least fifteen minutes to dry completely before you apply any new products.
This waiting period is a small price to pay for the assurance that your paint will adhere properly. Patience during the preparation phase is the hallmark of a successful interior painting project that stands the test of time.
Professional Painting Resources
For those looking to expand their knowledge on paint chemistry and proper application techniques, the American Coatings Association provides extensive information on industry standards. Their resources cover the science of binders, solvents, and the evolution of modern paint formulations.
Understanding these technical details can help you appreciate why certain surfaces behave the way they do and why specific prep steps are required for different types of paint. While you don’t need to be a chemist to paint your home, a basic understanding of how these materials interact will make you a much more confident and effective DIY painter.
Learning about the history of paint can also be quite revealing. Many older homes contain layers of lead-based paint, which was common before it was banned in the late 1970s. If your home was built during this era, be extremely cautious when sanding or scraping, as this can release hazardous dust.
Always prioritize safety and, if you suspect lead paint, consider using encapsulating primers rather than sanding the surface. The goal of any project should be a beautiful finish, but it must be achieved in a way that protects your health and the integrity of your home.
Frequently Asked Questions
Is it possible for a wall to be both oil-based and water-based?
No, the top layer of paint is what you are interacting with, but the underlying layers can be different. If you have a latex topcoat over an oil-based base, the Rub Test will detect the latex, but the bond between the layers might still be weak. If you suspect multiple layers of different types, it is safer to prime the entire surface with a bonding primer.
What happens if I ignore the test and paint anyway?
You risk “paint failure,” where the new layer does not stick to the old one. This often appears as bubbling, peeling, or sheets of paint coming off when you remove painter’s tape. Repairing this requires sanding everything down and starting over, which is significantly more work than doing the test in the first place.
Can I use vinegar instead of denatured alcohol?
Vinegar is not a strong enough solvent to break down the chemical bonds in paint. It is excellent for cleaning surfaces, but it will not give you a reliable result for the Rub Test. Stick to denatured alcohol or high-percentage rubbing alcohol to ensure your results are accurate.
Do I need to sand the wall if I use a bonding primer?
Usually, no. A high-quality bonding primer is designed to stick to glossy surfaces without the need for heavy sanding. However, if the surface is extremely dirty, greasy, or damaged, a light scuff-sanding is always a good idea to ensure a clean surface for the primer to grip.
How do I dispose of the cotton balls used in the test?
Since they are saturated with alcohol, let them air dry in a safe, non-flammable area before throwing them in the trash. Do not leave them in a pile or near heat sources while they are still wet. Once dry, they can be disposed of with your regular household waste.
The Rub Test is an essential diagnostic tool that every homeowner should master before beginning a painting project. By confirming whether your existing surfaces are oil or water-based, you take the guesswork out of the process and ensure that your new paint job provides a beautiful, durable finish. Remember that the chemistry of the wall determines the success of your project, and taking a few extra minutes to test your surfaces will save you from the disappointment of peeling paint later.
If you are ever in doubt, the safest path is to use a high-quality bonding primer that is formulated to handle any surface type. With the right preparation and the right materials, you can achieve professional-level results that transform your living space with confidence and ease.